At Arizona Termite Control, we understand how vital it is to protect your home from termites. Termite infestation can cause extensive damage, turning your property investments into a homeowner’s nightmare. This guide will walk you through the termite barrier installation process to help safeguard your home effectively. Whether you’re a new homeowner or have been residing in your house for years, this ultimate guide is designed to arm you with the knowledge you need.
Contents
- 1 Understanding Termite Barriers
- 2 Types of Termite Barriers
- 3 Chemical Termite Barriers
- 4 Physical Termite Barriers
- 5 Pros and Cons of Different Barriers
- 6 Signs You Need a Termite Barrier
- 7 DIY vs. Professional Installation
- 8 Steps to Install a Chemical Barrier
- 9 Steps to Install a Physical Barrier
- 10 Common Mistakes to Avoid
- 11 Maintenance Tips for Termite Barriers
- 12 How We Can Help
Understanding Termite Barriers
A termite barrier serves as a protective shield for your home. But what exactly is a termite barrier? Essentially, it’s a Treatment applied to the soil around and beneath your home, creating an impenetrable boundary that termites cannot cross. These barriers can not only prevent new infestations but also help manage existing ones.
Types of Termite Barriers
There are several types of termite barriers, and each has its benefits. Chemical barriers involve applying a liquid insecticide to the soil, while physical barriers use materials like metal or crushed rock. Both methods can be highly effective when installed correctly. Let’s delve into the specifics of these types.
Chemical Termite Barriers
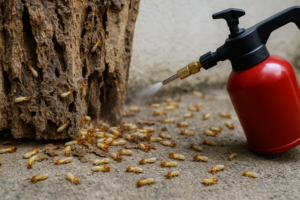
Chemical termite barriers work by applying a liquid pesticide to the soil around your home. This pesticide creates a dangerous zone for termites, preventing them from entering. In this section, we will discuss the process and benefits of chemical barriers. Chemical barriers are popular because they offer long-lasting protection and can be applied quickly.
Physical Termite Barriers
Physical termite barriers use materials that termites cannot chew through, such as metal or crushed rock. These barriers act as a physical deterrent, stopping termites from gaining entry. While installation might be more labor-intensive than chemical barriers, they are equally effective. Physical barriers are often used in conjunction with chemical treatments for maximum protection.
Pros and Cons of Different Barriers
Choosing between a physical or chemical barrier depends on several factors, including cost, installation time, and longevity. Each type has its advantages and disadvantages.
- Chemical Barriers: Effective and long-lasting but may require periodic reapplication.
- Physical Barriers: Durable and non-toxic but can be expensive and labor-intensive to install.
- Combination Methods: Provide maximum protection but can be more costly and complex to install.
- Environmental Impact: Chemical barriers can have environmental repercussions, whereas physical barriers are more eco-friendly.
- Maintenance: Physical barriers usually require less upkeep compared to chemical ones.
Signs You Need a Termite Barrier
Knowing the signs of termite activity can help you decide if you need a barrier. Typical warning signs include mud tubes, discarded wings, and damaged wood. If you notice any of these signs, it might be time to consider installing a termite barrier immediately. Early detection and action can save you significant expense and stress down the line.
DIY vs. Professional Installation
While some homeowners may consider installing a termite barrier themselves, professional installation offers several advantages. Experts have the knowledge and tools required to ensure the barrier is effective. We at Arizona Termite Control recommend trusting professionals for this task to guarantee long-lasting protection and peace of mind.
Steps to Install a Chemical Barrier
If you decide to go with a chemical barrier, here’s a step-by-step guide on what to expect during installation.
- Site Preparation:
First, clear any debris around your home’s perimeter. - Trench Digging:
A trench is dug around the home where the pesticide will be applied. - Pesticide Application:
The liquid pesticide is poured into the trench and allowed to soak into the soil. - Backfilling:
The trench is backfilled with soil and compacted. - Final Inspection:
A thorough inspection ensures that the barrier is correctly installed and free from gaps.
Steps to Install a Physical Barrier
Physical barriers also follow a multi-step installation process. Here’s a broad outline:
- Initial Assessment:
First, an assessment is made to determine where the barrier needs to be placed. - Material Selection:
Choose materials like metal sheeting or crushed rock. - Installation:
The selected materials are placed strategically around your home. - Sealing:
Any gaps are sealed to ensure no termite can bypass the barrier. - Final Check:
An inspection is carried out to ensure the barrier’s effectiveness.
Common Mistakes to Avoid
Several common mistakes can render your termite barrier ineffective. One of the biggest errors is improper application or placement of the barrier materials. Avoid using substandard products and always adhere to guidelines to ensure longevity and effectiveness.
Maintenance Tips for Termite Barriers
After installation, regular maintenance ensures your termite barrier remains effective. Periodic Inspections are crucial for chemical barriers, while physical barriers require checks for any breaches.
How We Can Help
At Arizona Termite Control, our experts are equipped to handle termite barrier installations perfectly. From initial consultation to final inspection, we ensure your home is adequately protected. Trusting professionals like us can save you time, money, and stress.
For professional termite barrier installation, contact Arizona Termite Control by phone # 480-660-3093 or Request a Free Inspection.