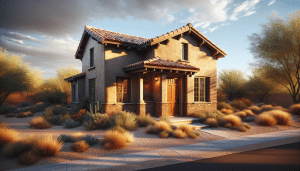
Termites don’t knock before they move in. One day your patio looks fine; next you’re scratching at paint and wondering where that soft spot came from. You can’t stop every pest overnight, but you can make your house a lot less welcoming. Installing termite barriers is one of the smartest things a Maricopa County homeowner can do—especially with our long, hot summers and the sudden monsoon rains that change the game. Let me explain how to do this properly, what to expect, and when it’s time to call Arizona Termite Control. Honest talk: some of this you can handle yourself, some you shouldn’t—so I’ll point out both.
Contents
- 1 Why bother with termite barriers? (Short answer: Prevention beats panic)
- 2 Types of termite barriers—pick the right tool for the job
- 3 How to install a physical barrier—step-by-step for homeowners
- 4 How to install a chemical barrier safely and effectively
- 5 Maintenance, seasonal tips, and a few local things to watch
- 6 DIY or call Arizona Termite Control? How to decide
- 7 Ready to protect your home? Let’s make it simple.
Why bother with termite barriers? (Short answer: Prevention beats panic)
Think of a termite barrier as a belt and suspenders for your foundation. It’s not glamorous, but it works. Barriers reduce the chance soil-feeding termites reach wood, framing, and your home’s hidden guts. In Maricopa County, Drywood and Subterranean termites both cause trouble—drywood prefers drier wood above ground, while subterranean termites come up from the soil. That means barriers at the soil line really matter.
Bottom line: barriers lower risk and save money long term. You’ll pay a little now to avoid a big repair bill later. Sounds simple, right? It often is, but there are catches—soil type, drainage, landscaping, and even the kind of mulch you love all matter.
Types of termite barriers—pick the right tool for the job
There are two main camps: physical and chemical. They work differently, so sometimes you’ll see them used together.
- Physical barriers — stainless-steel mesh (such as Termimesh), galvanized metal shields, or specially graded sand. These block termites like a screen door blocks bugs.
- Chemical barriers — liquid termiticides (brands like Termidor are widely used) that create a treated zone in the soil. They either repel or kill termites that cross the line.
You might think one is always better. That’s not true. Physical barriers are long-lasting but can be pricey to retrofit; chemical barriers are flexible and common for retrofit treatments but need proper application to be effective. Sometimes you mix both—because redundancy is comforting.
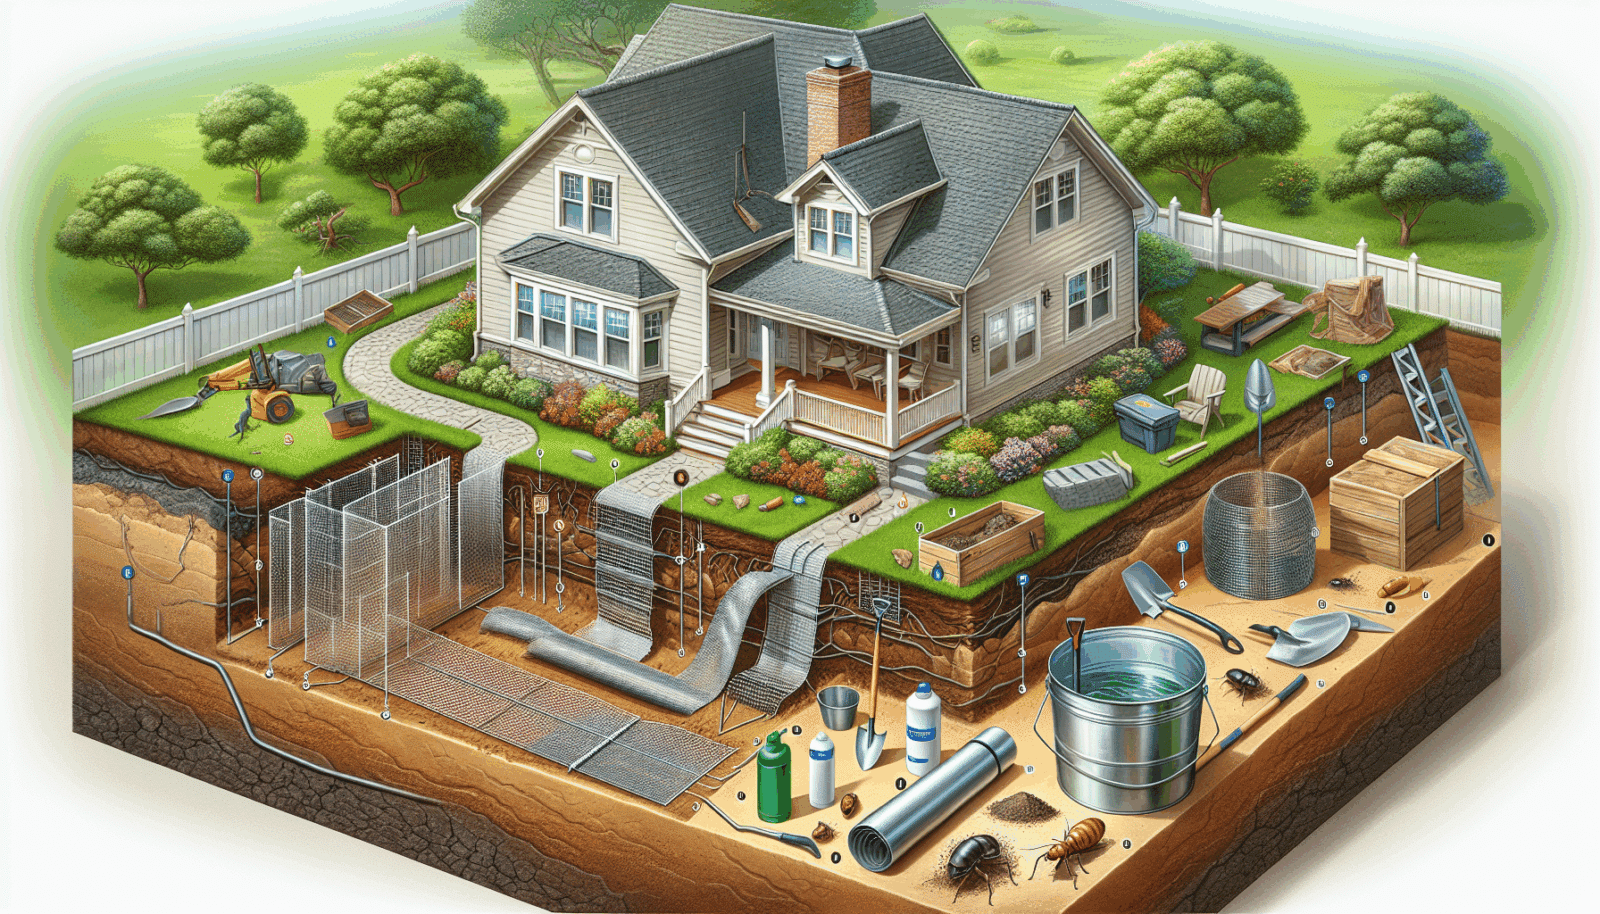
How to install a physical barrier—step-by-step for homeowners
If your home’s new construction or you’re restoring exposed foundation, a physical barrier is an excellent choice. Here’s a homeowner-friendly approach. You know what? It looks harder than it is.
- Clear the work area. Remove plants, mulch, and debris next to the foundation—about 6–12 inches wide.
- Dig a shallow trench along the foundation. Aim for 4–6 inches deep if you’re using sand; deeper if you’ll tuck mesh under slab edges.
- Install the barrier. For stainless mesh, press it against the foundation and secure with corrosion-resistant anchors. For sand, use graded silica sand (not play sand)—it must be the right grain size so termites can’t tunnel through.
- Backfill carefully. Compact the soil so the barrier stays seated. Seal gaps with construction caulk or mortar where needed.
Tools: shovel, tamper, utility knife, drill (with masonry bits), screws/anchors, PPE (gloves, goggles). If you’re working around stucco or pavers, take your time—damage is easy to cause, and repairs add cost.
How to install a chemical barrier safely and effectively
Chemical barriers are common for existing homes. The main idea: create a continuous treated zone between soil and wood. Here’s a general homeowner-friendly guide—remember, products differ, so read labels.
Trench and Treat: Dig a trench 6–12 inches from the foundation and 6–12 inches deep. Mix the termiticide per the label and pour it into the trench. Backfill and compact.
Sub-slab injections: For slab-on-grade homes, licensed applicators drill through slab joints and inject termiticide under the slab. This is technical and messy—don’t try it with a garden hose.
Safety first: wear gloves, a respirator if recommended, and eye protection. Keep kids and pets away until the product has settled. If you’d rather not handle chemicals, call a pro—Arizona Termite Control uses EPA-labeled products and follows local regs.
Maintenance, seasonal tips, and a few local things to watch
Installing a barrier is not a “set it and forget it” move—especially around here. Monsoon season (July–September) changes moisture levels fast; standing water near your foundation will undermine a barrier. So:
- Check gutters and downspouts before summer. Redirect water away from the foundation.
- Keep mulch and planters at least 6 inches from siding. I know, it ruins that seamless look, but the trade-off beats a repair bill.
- Inspect annually. Look for cracks, settled soil, or new wood-to-soil contact. If you spot mud tubes on the foundation, don’t wait.
The mild contradiction here: you should inspect regularly, but don’t over-fuss. Small checks are enough; obsessing won’t help. Call a pro if anything’s weird—termite signs can be subtle.
DIY or call Arizona Termite Control? How to decide
Some things are very DIY-friendly—clearing soil, installing sand barriers in small areas, or regrading a flower bed. Some tasks are best left to licensed pros: full slab injections, large-scale trenching, or when you’ve already found active infestation. Here’s a quick rule of thumb:
- Do it yourself if the job is small, non-chemical, and you’re comfortable with tools.
- Call Arizona Termite Control for slab work, chemical treatments, or if you want a guarantee. We’ve treated homes across Maricopa County—Phoenix, Scottsdale, Mesa—and we know how local soils and weather play into termite behavior.
Honestly, prevention felt less urgent before you saw the damage. Now? It matters. A professional can often save you time and give long-term assurance.
Ready to protect your home? Let’s make it simple.
If you want a second set of eyes, or you prefer a pro to install or inspect a barrier, Arizona Termite Control is just a phone call away. We’ll assess the soil, your foundation type, and the landscaping, then recommend a plan that fits your budget and lifestyle.
Call us at 480-660-3093 or Request a Free Inspection. Don’t wait until a soft spot becomes a headline you didn’t want—let’s keep your home safe.